Knowledge Base
Find Your Answers
How to Create an Invoice
Steps:
From the Dashboard, click on “Create New” (top-center).
Choose “Invoice” from the list.
Enter invoice details including customer and product info.
To add more products, click “Add Product”.
Click “Create” (bottom-right corner) to finalize.
After creation, you can:
Download the invoice as a PDF
Share it via WhatsApp or Email
Mark it as Paid if payment is received immediately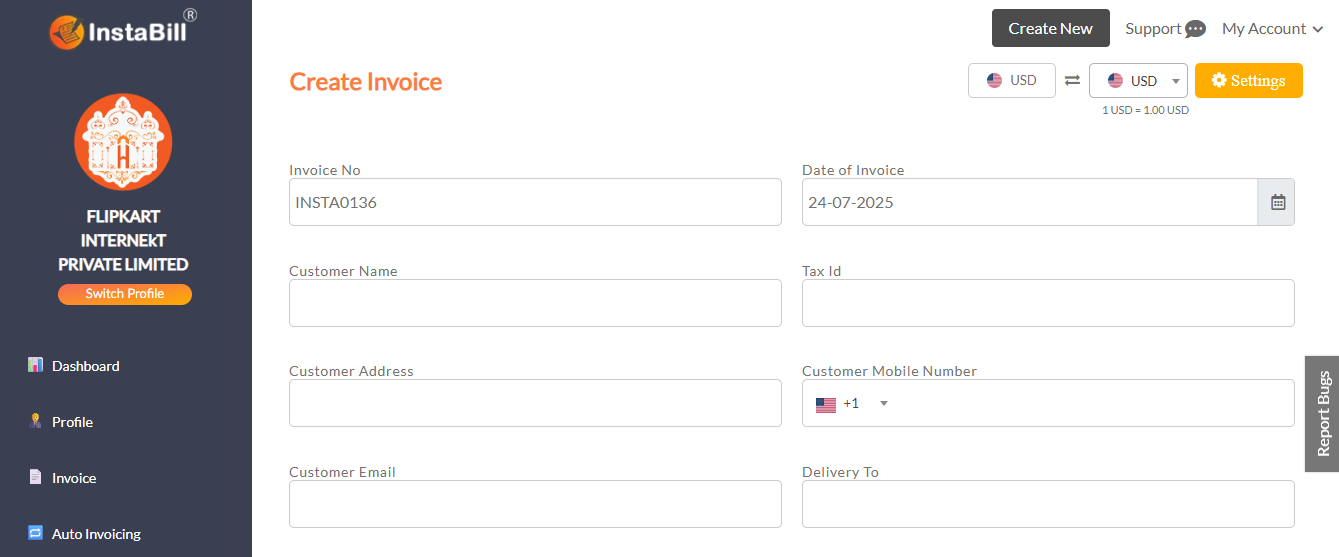
How to Create a Quotation
Steps:
On the Dashboard, click on “Create New” (top-center).
Select “Quotation”.
Enter:
Customer details
Product or service details
Terms & conditions
Click “Create” (bottom-right corner).
You can download the quotation as a PDF, or share via WhatsApp and Email. You can also mark it as Paid if payment is received.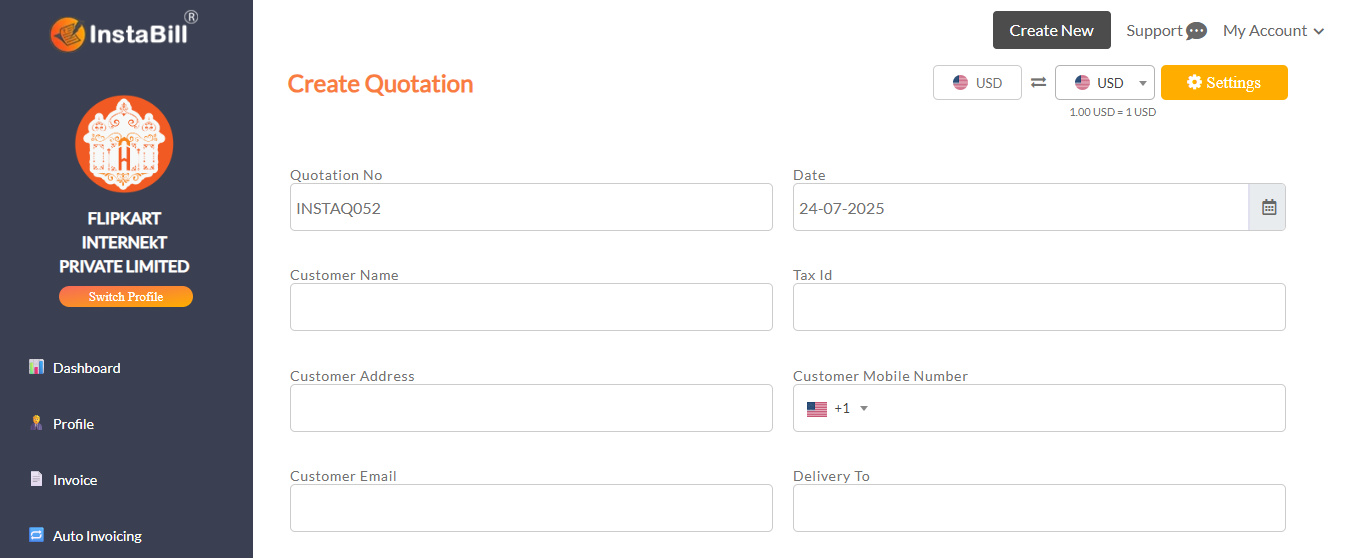
How to Record Expenses
Steps:
Click “Create New” on the Dashboard.
Select “Expense”.
Fill in the necessary details.
Click “Create” to save the expense.
Click “Create New” on the Dashboard.
Select “Expense”.
Fill in the necessary details.
Click “Create” to save the expense.
How to Edit an Invoice
Steps:
Go to the Menu Bar on the left and click on “Invoice”.
A list of created invoices will appear on the right panel.
Use filters to find the invoice:
Search box
Customer name
Date range
Payment status (Paid/Unpaid)
Click on the invoice you wish to edit and make the necessary changes.

Go to the Menu Bar on the left and click on “Invoice”.
A list of created invoices will appear on the right panel.
Use filters to find the invoice:
Search box
Customer name
Date range
Payment status (Paid/Unpaid)
Click on the invoice you wish to edit and make the necessary changes.
Invoice Footer – Purpose & Setup
The Invoice Footer is used to display standard text such as terms & conditions, disclaimers, or additional information on every invoice.
How to Add or Edit Invoice Footer:
Navigate to the Menu Bar (Left Side).
Click on “Settings” or go to “My Account > Settings”.
Select the “Invoice” option.
Click on “Invoice Footer”.
Enter your desired text (e.g., terms & conditions).
Click “Update” to save.
This footer will now automatically appear on all generated invoices. You can edit it anytime by repeating the above steps.
How to Add Bank Details
Steps:
Navigate to Settings > Payments > Bank Details.
Enter the required information.
Save the details.

Navigate to Settings > Payments > Bank Details.
Enter the required information.
Save the details.
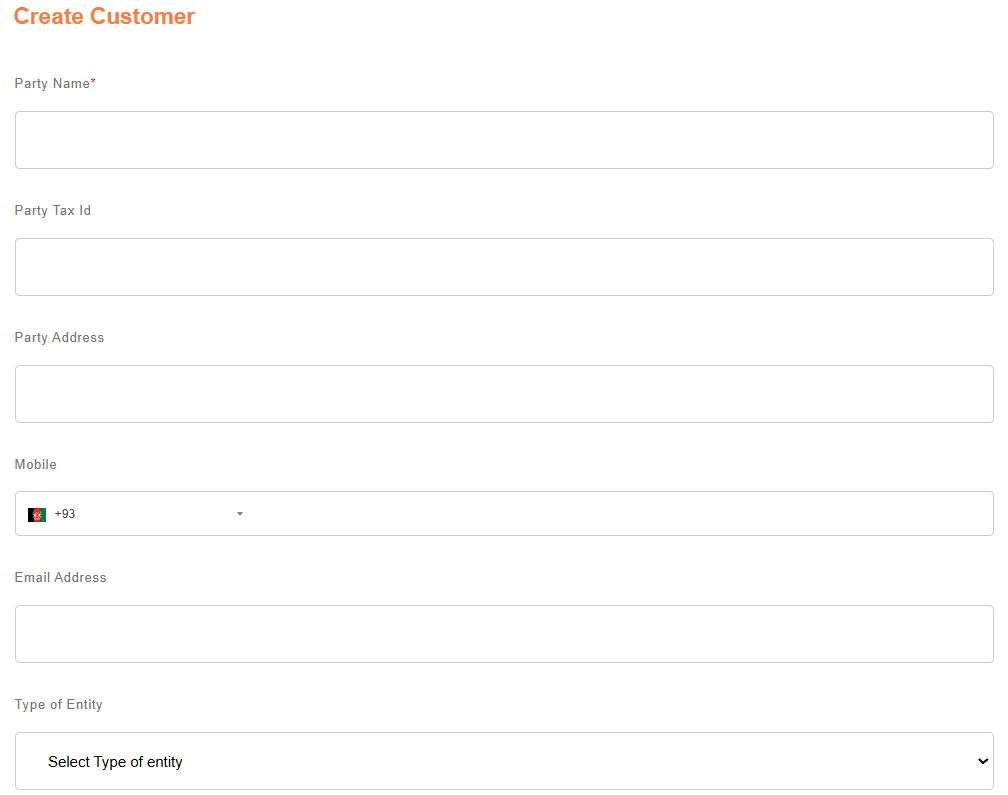
How to Add Party (Vendor) Details
Steps:
On the Dashboard, click on “Create New” (top-right corner) or click the “+” button (bottom-right corner).
Select “Party” under the Purchase section.
A form will open – fill in all required vendor details.
Click “Create” to save.
Once saved, vendor details will auto-fill during purchase entries.
On the Dashboard, click on “Create New” (top-right corner) or click the “+” button (bottom-right corner).
Select “Party” under the Purchase section.
A form will open – fill in all required vendor details.
Click “Create” to save.
Once saved, vendor details will auto-fill during purchase entries.
How to Connect Stripe Payment Gateway
Steps:
Click “Connect” under the Stripe integration section.
You will be redirected to the Stripe login page.
Enter your credentials and click “Authorize”.
Benefits After Connecting Stripe:
Enable “Pay Now” button on invoice PDFs shared with customers.
Enable Auto-Invoicing for payments made via Stripe (e.g., website, YouTube, WhatsApp, etc.).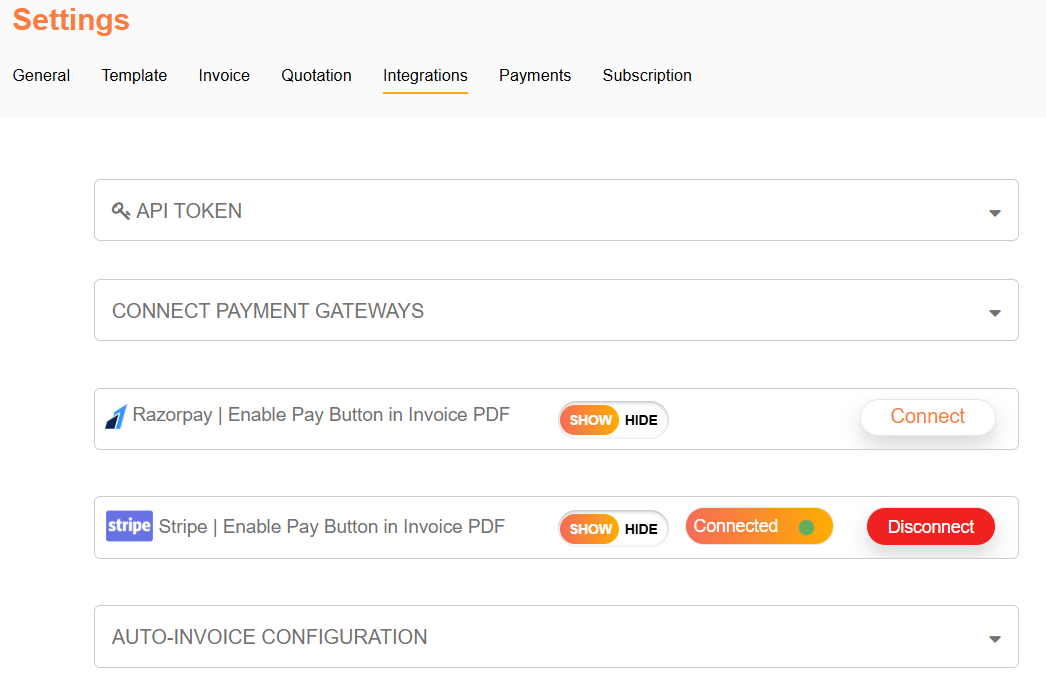
How to Connect Razorpay Payment Gateway
Steps:
Go to Settings > Integration.
Click the “Connect” button for Razorpay.
You’ll be redirected to the Razorpay login page.
Enter credentials and authorize access.
Benefits After Connecting Razorpay:
Enable “Pay Now” button on invoice PDFs.
Enable Auto-Invoicing when payments are made via Razorpay across multiple platforms.
How to Change System Settings
Steps:
Go to Settings from the Menu Bar.
Select “General”.
Here you can update:
General settings
Templates
Quotations
Integration settings
Payment settings
Go to Settings from the Menu Bar.
Select “General”.
Here you can update:
General settings
Templates
Quotations
Integration settings
Payment settings